-
How to Inspect DIN Weld Neck Flanges PN40 for Quality Assurance
Date:
14 Jun,2025
How to Inspect DIN Weld Neck Flanges PN40 for Quality Assurance Table of Contents Understanding DIN Weld Neck Flanges The Importance of Quality Assurance in Flanges Overview of the Inspection Process Visual Inspection Techniques for Weld Neck Flanges Conducting Dimensional Checks Nondestructive Testing Methods for Quality Assurance Material Certification and Traceabili
How to Inspect DIN Weld Neck Flanges PN40 for Quality Assurance
Table of Contents
- Understanding DIN Weld Neck Flanges
- The Importance of Quality Assurance in Flanges
- Overview of the Inspection Process
- Visual Inspection Techniques for Weld Neck Flanges
- Conducting Dimensional Checks
- Nondestructive Testing Methods for Quality Assurance
- Material Certification and Traceability
- Common Defects in DIN Weld Neck Flanges and How to Identify Them
- Conclusion
- FAQs
Understanding DIN Weld Neck Flanges
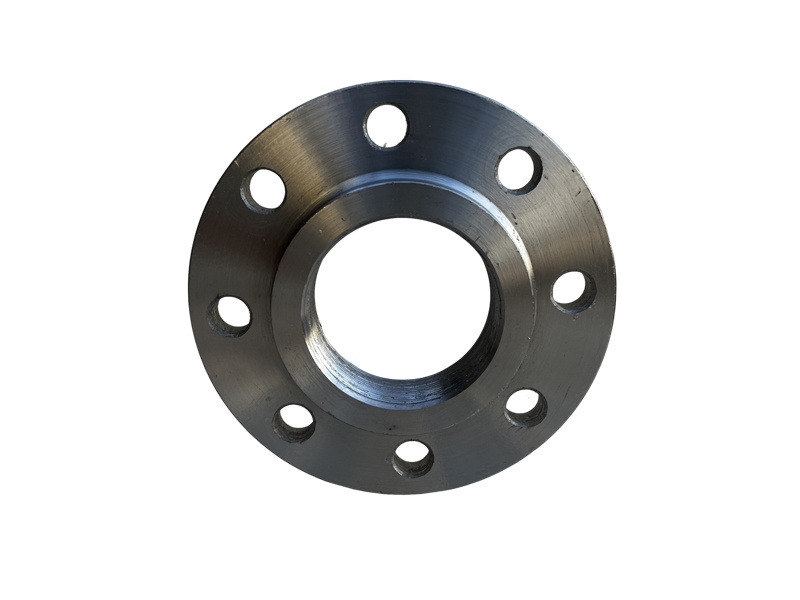
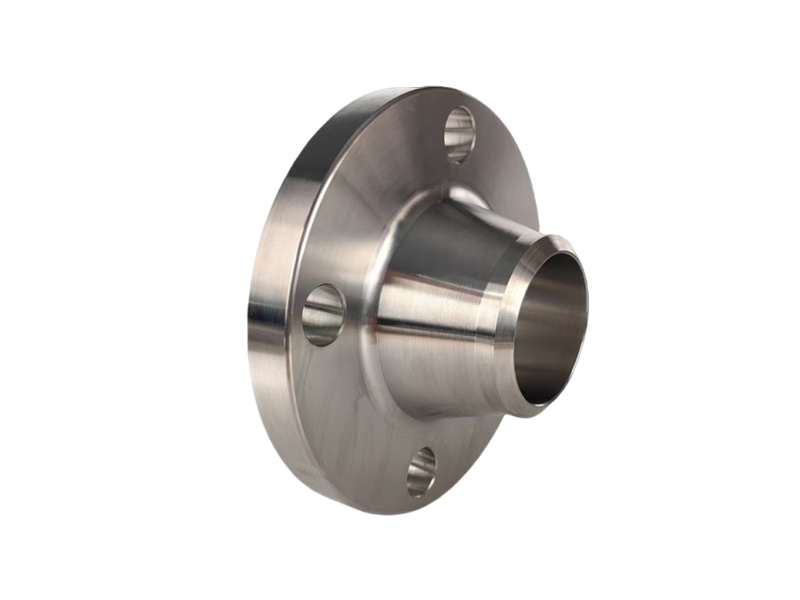
DIN Weld Neck Flanges, classified under the European standard DIN (Deutsches Institut für Normung), are crucial components in piping systems. These flanges are characterized by a long neck that provides a smooth transition between the pipe and the flange itself. The PN40 classification indicates the nominal pressure rating, which allows these flanges to withstand high-pressure applications. Understanding the specifications and design features of DIN Weld Neck Flanges is the first step toward ensuring quality.
The Importance of Quality Assurance in Flanges
Quality assurance in the manufacturing and installation of DIN Weld Neck Flanges is essential for the reliability and safety of piping systems. Flanges are subject to various stresses, and any defects can lead to catastrophic failures. By implementing rigorous inspection procedures, we can significantly mitigate risks, enhance performance, and comply with industry standards. Quality assurance also helps in building trust with clients and stakeholders, ensuring that our projects meet both regulatory and operational demands.
Overview of the Inspection Process
The inspection process for DIN Weld Neck Flanges encompasses several key stages. Each stage is designed to identify potential flaws or deficiencies that could compromise the integrity of the flange. While the procedures may vary depending on the application and industry requirements, we typically follow these essential steps:
1. **Preparation**: Gather all necessary tools and documentation, including technical specifications and quality standards.
2. **Visual Inspection**: Conduct a preliminary visual inspection to assess the overall condition.
3. **Dimensional Checks**: Measure critical dimensions to ensure compliance with specifications.
4. **Nondestructive Testing**: Perform tests such as ultrasonic testing or radiographic examination to detect hidden flaws.
5. **Documentation**: Record all findings and ensure traceability for future reference.
Visual Inspection Techniques for Weld Neck Flanges
Visual inspection is the first line of defense in quality assurance. It enables us to quickly identify obvious defects. Here are some techniques we implement during visual inspections:
1. Surface Condition Assessment
Examine the flange surface for any signs of corrosion, pitting, or scaling. These could indicate potential weaknesses that may affect performance.
2. Weld Quality Verification
Inspect the weld area for discontinuities such as cracks, undercuts, or improper fusion. The quality of the weld joint is crucial for maintaining the structural integrity of the flange.
3. Markings and Identification
Verify that all required markings, such as size, pressure rating, and material specifications, are clearly visible and comply with industry standards.
Conducting Dimensional Checks
Dimensional accuracy is vital in ensuring that DIN Weld Neck Flanges fit correctly within piping systems. We utilize precise measuring tools to conduct the following checks:
1. Diameter Measurements
Measure the inside and outside diameters of the flange to ensure they meet the specified standards.
2. Thickness Verification
Check the thickness of the flange and the neck to ensure they are within acceptable tolerances.
3. Bolt Hole Alignment
Verify the alignment and dimensions of bolt holes to ensure proper installation and prevent leaks.
Nondestructive Testing Methods for Quality Assurance
To detect internal flaws that may not be visible through standard inspections, we employ various nondestructive testing (NDT) methods:
1. Ultrasonic Testing (UT)
Ultrasonic testing utilizes high-frequency sound waves to identify internal defects. This method is effective for detecting cracks or voids within the material.
2. Radiographic Testing (RT)
Radiographic testing involves using X-rays to create images of the flange's internal structure, revealing any hidden imperfections.
3. Magnetic Particle Testing (MT)
This method helps in detecting surface and near-surface defects in ferromagnetic materials by applying magnetic fields.
Material Certification and Traceability
Ensuring that DIN Weld Neck Flanges are made from certified materials is critical for quality assurance. We require documentation, such as Mill Test Reports (MTRs), to verify material composition and mechanical properties. By maintaining a traceability system, we can track the source of materials, ensuring compliance with industry specifications and enhancing accountability.
Common Defects in DIN Weld Neck Flanges and How to Identify Them
Being aware of common defects can greatly assist in the inspection process. Here are some frequent issues and how to spot them:
1. Cracks
Look for visible cracks during visual inspections. Cracks can also be detected using ultrasonic or radiographic testing.
2. Corrosion
Surface rust and pitting should be noted during the visual inspection. Corrosion can lead to structural failure if not addressed promptly.
3. Misalignment
Check for misalignment of bolt holes and flanges during dimensional checks. Misalignment can cause installation difficulties and leaks.
4. Inadequate Welds
Inspect the weld area for signs of inadequate fusion or excessive spatter, which can compromise the flange's strength.
Conclusion
Inspecting DIN Weld Neck Flanges PN40 for quality assurance is an essential process that ensures the safety and reliability of piping systems. By following a structured inspection process, incorporating visual inspections, dimensional checks, and nondestructive testing, we can significantly mitigate risks associated with flange failures. Proper material certification and traceability further enhance our quality assurance efforts. By prioritizing these practices, we not only adhere to industry standards but also foster a culture of excellence in our projects.
FAQs
1. What is the difference between DIN and ANSI flanges?
DIN flanges are based on European standards, while ANSI flanges follow American standards. They differ in dimensions, pressure ratings, and design specifications.
2. Why is nondestructive testing important for flanges?
Nondestructive testing helps identify internal defects without damaging the flange, ensuring its integrity and reliability in high-pressure applications.
3. How often should flanges be inspected?
Flanges should be inspected regularly, especially in critical applications, and after installation or maintenance work.
4. What are the consequences of using defective flanges?
Using defective flanges can lead to leaks, pressure failures, and catastrophic accidents, endangering personnel and causing significant financial losses.
5. Can visual inspections alone ensure flange quality?
While visual inspections are essential, they should be supplemented with dimensional checks and nondestructive tests for comprehensive quality assurance.Related News
14 Jun,2025
How to Inspect DIN Weld Neck Flanges PN40 for Quality Assurance
How to Inspect DIN Weld Neck Flanges PN40 for Quality Assurance Table of Contents Understanding DIN Weld Neck Flanges The Importance of Quality Assurance in Flanges Overview of the Inspection Process Visual Inspection Techniques for Weld Neck Flanges Conducting Dimensional Checks Nondestructive Testing Methods for Quality Assurance Material Certification and Traceabili
13 Jun,2025
Understanding DIN Weld Neck Flanges PN40: Essential Insights for Your Projects
DIN weld neck flanges PN40 are a crucial component in piping systems, primarily utilized in applications requiring high pressure and temperature resistance. Designed according to the German Institute for Standardization (DIN), these flanges ensure compatibility and robustness in various industrial settings. ### Key Features of DIN Weld Neck Flanges PN40 1. **Design and Construction**: The weld nec
12 Jun,2025
The Environmental Impact of DIN Weld Neck Flanges PN40 Production: A Comprehensive Analysis
The Environmental Impact of DIN Weld Neck Flanges PN40 Production In the ever-evolving landscape of industrial production, the focus on sustainability is becoming increasingly critical. One key component in various piping systems is the DIN Weld Neck Flange PN40, widely used in industries ranging from oil and gas to chemical processing. Understanding the environmental impact of producing these fla
Contact information
Address: North Ring Industrial Zone, Mengcun County
Telephone: 86 0317- 6729218 86 0317-6727320
Fax: 0317-6727310
mobile phone: 86 13833761688whatsapp: 86-13780271039
Email: shengyuanflange@163.comLeave Message


